Pond liner installation is an important part of creating a functional and lasting pond. It involves placing a waterproof barrier that holds water and protects the surrounding soil. This process helps prevent leaks and maintains the pond’s shape over time.
The key to a successful pond liner installation is ensuring the liner is properly placed and protected to avoid damage. Proper preparation of the pond base and careful handling of the liner are essential steps that contribute to the pond’s durability and performance.
1) Plan the pond shape and size accurately before digging
The first step in pond liner installation is to plan the pond’s shape and size carefully. It should fit within a simple shape like a rectangle or oval to match common pond liner sizes. This makes it easier to cover the pond without cutting the liner too much.
He or she must measure the maximum length, width, and depth of the planned hole. Remember to include the deepest point and the edges. These measurements help determine the correct size of the liner needed.
It is important to add extra liner length for the sides and overlap at the edges. This prevents gaps and ensures full coverage of the pond hole. Accurate planning helps avoid waste and costly mistakes.
Planning the shape and size first allows for a smooth digging process. When the hole matches the plan, liner installation can be faster and fit better. More details on sizing pond liners can be found in the Pond Liner Size Calculator.
2) Excavate the hole 2 inches wider and deeper than the liner
The hole for the pond should be dug at least 2 inches wider and deeper than the pond liner. This extra space allows for adjustments and helps prevent damage to the liner edges during installation.
He should remove any large rocks, roots, or sharp objects from the hole to protect the liner from punctures. The surface should be as smooth and even as possible.
Digging wider and deeper also helps when adding rocks or other decorations later. These additions can reduce the pond’s size, so the extra space keeps the final pond closer to the planned dimensions.
If the liner is for a hard shell pond, maintaining this spacing is especially important. It ensures the liner fits properly and lasts longer without stretching or tearing.
They should check the depth and width with a tape measure to make sure the hole matches the liner size plus the 2-inch allowance before placing the liner.
For more detailed steps on digging a proper hole, see the guide on installing a hard shell pond liner.
3) Remove sharp stones and debris to protect the liner
Before placing the pond liner, it is important to clear the area of sharp stones, broken roots, and other debris. These objects can cause punctures or tears in the liner over time.
Removing them helps extend the life of the liner and prevents costly repairs. Many recommend carefully digging and sifting through the soil to pick out any materials that could damage the pond liner.
After clearing the debris, adding a layer of sand or a protective fabric beneath the liner offers extra protection. This cushion reduces contact with any small sharp objects that were missed during cleanup.
Taking the time to prepare the ground by removing sharp stones and debris ensures the pond liner stays intact and lasts longer. For more details on protecting your pond liner, see this guide on pond liner preparation and protection.
4) Slope the sides gently instead of vertical walls
Sloping the sides of a pond gently helps make the liner installation easier. It reduces stress on the liner by spreading out the pressure from water and soil. This can lower the chance of tears or wrinkles developing.
A gentle slope also helps keep the liner in place better. It is easier to anchor the liner on sloped sides than on vertical walls where it might slip or shift. This improves the pond’s durability over time.
In ponds with vertical walls, the liner needs extra care to prevent movement and leaks. Sloped sides provide a natural way to hold the liner down without using too many anchors.
Sloping also makes maintenance simpler. Algae and debris are less likely to build up on angled sides compared to vertical ones.
For advice on managing liners on steep or vertical walls, see how to replace or anchor liners on slopes and walls at BTL Liners.
5) Pack soil or use expanding foam to smooth voids beneath the liner
Before laying the pond liner, it is important to create a smooth surface. Any holes, gaps, or sharp spots should be filled to prevent damage to the liner.
One common method is to pack soil firmly into any voids. This helps form a stable, even base. It also reduces the risk of the liner tearing or puncturing over time.
Another option is to use expanding foam designed for pond use. This foam fills gaps quickly and hardens to provide strong support. It can be useful in uneven areas or where soil compaction is difficult.
Using foam requires care to avoid sharp edges that might harm the liner. They should smooth the foam surface once it hardens.
Both methods work well to protect the liner from rocks or roots. Preparing the base in this way helps ensure the liner lasts longer and holds water securely. More details can be found about using black waterfall pond expanding foam and soil packing techniques on Everything Ponds.
6) Lay down an underlayment or protective barrier like carpet
Before placing the pond liner, it is important to lay down an underlayment or a protective barrier such as old carpet. This layer cushions the liner and helps prevent damage from sharp stones or roots beneath.
The underlayment also helps with gas expulsion. Soil naturally releases gases that could cause bubbles or damage under the liner. A barrier allows these gases to escape safely.
If the ground is smooth and free of debris, the underlayment might not be strictly necessary. However, using one adds extra protection and can extend the life of the pond liner.
It is best to cover the entire pond base and sides with the underlayment before fitting the liner. This creates a secure, even surface that reduces the risk of punctures.
More details on the benefits and installation of a protective layer under pond liners can be found in this guide on secure your pond liner with quality underlayment.
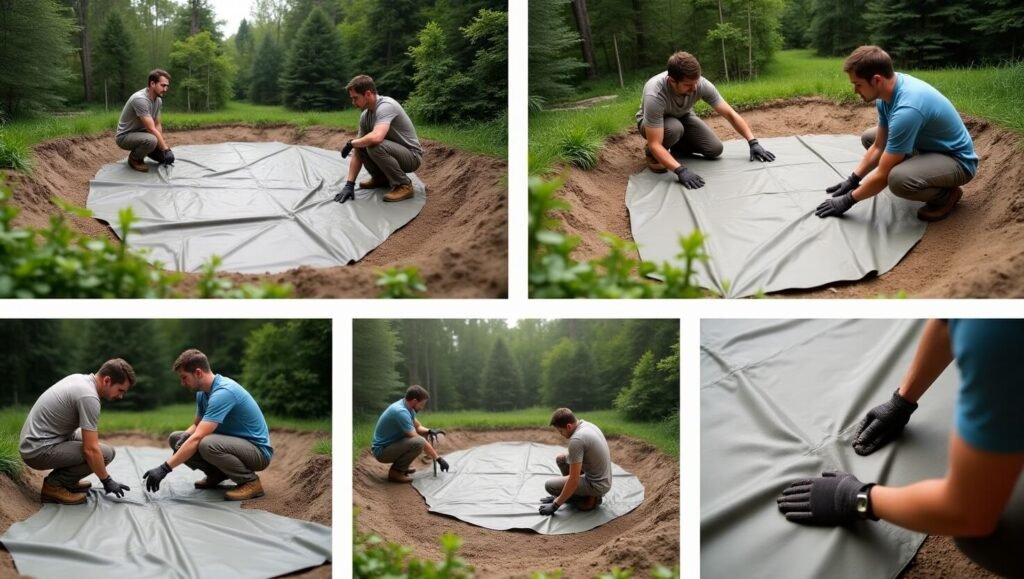
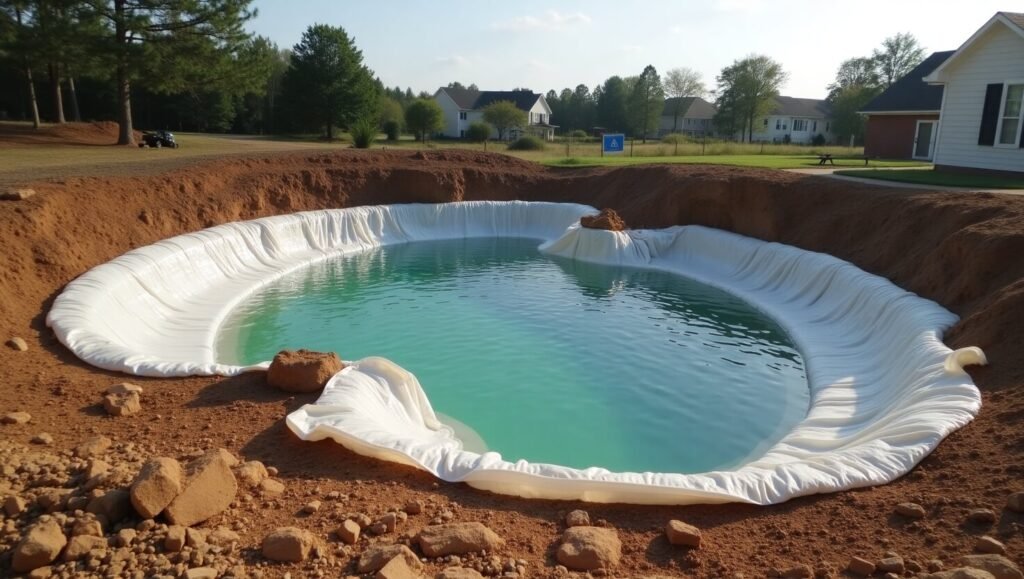
7) Position the pond liner carefully to cover all areas
The pond liner should be laid gently into the hole, making sure it covers every part of the pond’s surface. It is important to avoid stretching or tearing the liner during this step.
They should leave at least 18 inches of overlap around the edges. This extra liner helps secure the liner outside the pond and prevents water from leaking.
Bricks or heavy objects can be placed lightly around the edge to hold the liner in place. It is important to put weights on the liner, not inside the pond hole, to avoid pulling the liner inward.
The installer should smooth out any wrinkles by adjusting the liner carefully. Wrinkles can cause the liner to wear out faster or create weak spots.
Measuring the pond hole before positioning the liner is key. The liner must fit well to avoid water loss and to make installation easier.
For more details on careful positioning and securing the liner, see this pond liner installation guide.
8) Allow liner to relax and settle before final adjustments
After placing the pond liner and filling the pond with water, it is important to let the liner rest. This pause lets the material settle into the shape of the pond without tension.
Allowing the liner to relax helps it adjust to small dips and curves in the pond’s bottom and sides. This reduces the chance of stretching or damage later.
Waiting at least 24 hours is recommended for the liner to fully conform to the pond’s form. During this time, the liner may shift slightly as the weight of the water presses down.
Once the liner has settled, any excess material can be trimmed carefully around the pond edges. Final adjustments like smoothing wrinkles or repositioning can be made now.
Giving the liner time to adjust helps avoid problems such as tears or uneven surfaces. It is a key step for a durable and well-fitted pond liner. For more detailed steps on this process, see how to install a pond liner properly.
9) Trim excess liner after ensuring full coverage
Once the pond liner fully covers the pond shape and is properly positioned, the next step is trimming the extra material. The liner should still have some overlap around the edges to allow for anchoring.
It is important to leave about 6 to 30 centimeters (2 to 12 inches) of excess liner after trimming. This overlap helps secure the liner under stones, soil, or edging materials to keep it in place.
Cutting should be done carefully using sharp scissors or a utility knife. Uneven cuts could cause gaps or damage, so the trimming needs to be neat and precise.
Trimming too close to the pond edge too soon can risk liner slipping or tearing. Waiting until the pond is filled with water or shaped correctly helps ensure the liner lies flat and is stretched evenly before cutting.
Some guides suggest trimming after filling the pond and adjusting the liner shape to prevent wrinkles. Others recommend trimming before finishing the edges to maintain proper anchorage.
For detailed instructions on trimming and edging your pond liner, see this guide on pond liner installation.
10) Secure edges with rocks or soil to prevent liner movement
After placing the pond liner, securing its edges is important. This stops the liner from shifting or slipping out of place. Heavy materials like rocks or soil work well to hold it down.
Rocks should be placed carefully along the edge. Flat or rounded stones are good because they sit firmly without tearing the liner. Using rocks also helps protect the liner from sharp objects below.
Soil or mulch can be added behind the rocks to backfill and add extra weight. This keeps the edging stable and supports the liner. It also improves the look by blending the pond edges with the landscape.
For extra protection, placing a soft underlay between rocks and the liner can prevent damage from rough edges. The liner can then be covered gradually, ensuring it stays secure while maintaining pond shape. See how to backfill behind rocks for secure edges at Facebook’s pond group.
Preparing the Site for Pond Liner Installation
Proper site preparation is essential to prevent damage to the pond liner and ensure a stable structure. This process involves checking the soil, measuring the pond area accurately, and digging with care.
Assessing Soil Conditions
Before digging, the soil type and condition must be evaluated. Rocky or sharp soil can puncture the liner, so it’s important to remove stones, roots, and debris from the site. Sandy or loose soil may need compaction to avoid shifting or settling later.
A soil test can reveal drainage characteristics and stability. Poor drainage could cause water loss or liner damage. Adding a layer of sand or underlayment fabric can protect the liner by cushioning it from rough soil surfaces.
Measuring and Marking the Pond Area
Accurate measurements ensure the liner will fully cover the pond with extra material for securing the edges. Using a tape measure, the person should mark the intended pond shape on the ground, including any shelves or planting areas.
Marks can be made with stakes and string or spray paint. It’s important to check the shape and size multiple times to avoid mistakes during excavation. Adding at least 12-18 inches beyond the planned pond edge ensures enough liner overlap.
Excavation Best Practices
The hole should be dug with sloping sides rather than vertical walls to reduce pressure on the liner and soil. Shelves at different depths can be created for plants.
The bottom must be smoothed and cleared of sharp rocks or roots. After digging, a protective layer such as old carpet or landscape fabric can be placed to prevent liner punctures. Working slowly and carefully avoids damaging the liner during installation. For detailed guidance, see this pond liner installation guide.
Ensuring Proper Liner Fit and Longevity
A pond liner must fit well and be installed carefully to last for years. Proper sizing and avoiding damage help keep the liner intact. Secure placement and correct joining of liner edges also protect it from tearing or shifting.
Avoiding Common Installation Mistakes
The pond hole should be free of sharp rocks or roots that can puncture the liner. A soft layer of sand or underlayment placed beneath the liner reduces the risk of damage.
The liner must be large enough to cover the entire pond with extra overlap—usually 12 to 18 inches beyond the edge. This extra liner allows for uneven ground and settling.
Wrinkles or folds in the liner can cause stress points. The installer should smooth out creases carefully by hand, working from the center outwards to avoid trapping air or water between folds.
Securing and Seaming Pond Liners
To keep the liner from shifting, it helps to dig a trench around the pond’s edge and bury the extra liner in it. This acts as an anchor against wind or moving water.
When joining two pieces of liner, seams should be overlapped by at least 4 to 6 inches. A waterproof adhesive or seam tape designed for pond liners provides a strong bond and prevents leaks.
Regular checks of seamed areas are important, as seams are the most common place for leaks. Proper sealing, along with good anchoring, extends the life of the pond liner and maintains water tightness.
For more detailed guidance, see this step-by-step pond liner installation guide.
Frequently Asked Questions
Installing a pond liner requires careful preparation, including shaping the hole, removing debris, and fitting the liner to the pond’s dimensions. Proper steps and materials help avoid damage and make the liner fit smoothly.
What are the necessary steps for DIY pond liner installation?
First, accurately plan the pond’s shape and size. Dig the hole at least 2 inches wider and deeper than the liner to allow for fit and adjustment. Clear the area of sharp stones, roots, and sticks that could tear the liner. Slope the sides gently rather than making them vertical to prevent stress on the liner.
What materials should I place under my pond liner to protect it?
A layer of protective underlay or sand is commonly used beneath the liner. This helps cushion the liner against sharp objects and uneven ground. Expanding foam or packed soil can be applied to fill any voids, smoothing the base and preventing damage from shifting soil.
How do I install a pond liner in a square or rectangular pond?
When installing in a square or rectangular shape, start by positioning the liner so it overlaps the edges by at least 2 feet. Smooth the liner into the corners gradually, avoiding wrinkles. Ensure enough material is available to cover all sides and allow for some overlap beyond the pond edges.
What is the correct orientation for a pond liner during installation?
The liner should be laid with the smooth or finished side facing upward, toward the water. This side is designed to look better and last longer when exposed. The underside is usually rougher and meant to face the ground.
How can I properly fit a pond liner into corners without wrinkling?
Fitting corners without wrinkles requires gently pushing the liner into the corner and carefully folding any excess material away from the corner. Avoid stretching the liner too much, as this can cause tears and stress points. Work slowly and smooth out wrinkles as you go.
What is the average cost to have a professional install a pond liner?
Professional installation varies by location and pond size but typically costs between $1,000 and $3,000. This price includes excavation, liner placement, and finishing work to ensure the pond is correctly sealed and shaped.
Conclusion: Nail the Pond Liner Installation and Enjoy the Results
A beautiful pond begins with solid groundwork—literally. And that starts with proper pond liner installation.
It might not be the flashiest part of the project, but it’s the one that makes everything else possible. When you take the time to choose the right materials, prep the site carefully, and install the liner with patience and care, you set yourself up for long-term success. No slow leaks. No constant top-ups. Just a clean, reliable water feature that holds up over time.
Whether you’re creating a quiet garden escape or a lively koi haven, good pond liner installation ensures your vision doesn’t drain away—literally.
Take the time to do it right the first time:Choose the best pond liner that suits your pond’s needs.
Put in the effort now, and your future self (and your fish) will thank you.